Make dinner tonight, inspired!

Wondering what to make for dinner tonight? This is your place for quick and healthy meal inspirations. Here you'll find recipes for seasonally focused dinners, desserts, breakfasts, and everything in between.

My cooking focuses on the freshest ingredients prepared in a simple and careful way, to highlight their uniqueness. My own diet is primarily vegetarian, but does include sustainable fish and seafood, and is gluten free.

Thank you for reading. I look forward to sharing some of my favorite recipes with you!


30 June 2010

Almond Cake ala 'David'


This almond cake is wonderful. I mean, it's really really good! I made it last weekend for a house guest and loved it the first night although it seemed to get better the longer it sat. Four days later I was still looking forward to my slice after dinner and singing its praises. This is the same recipe that David Lebovitz recently posted on his blog. It's perfect as is so I didn't see any reason to make many changes, other than adapting to gluten-free, of course!

I was so busy enjoying the cake that I didn't bother to take any photos, hence the image above. I guess you'll just have to reference photos on DL's site for now and I'll post some next time I make this, which I have a feeling will be quite soon.

A couple of things to note.... 1) It's typical for this cake to fall a bit in the center when it cools. All those eggs cause it to souffle up a bit in the oven and then sink as it cools down. Don't worry, you won't notice when it's sliced and a sprinkling of powdered fixes many wrongs when dusted over top. 2) It's best to make this (as suggested by David) in a food processor so you can chop the almond paste very fine.

Serve this with berries & lightly whipped cream.

Enjoy!!

Almond Cake:
Yields 1, 10" cake (about 12 slices)

1 1/3 cups sugar
7 ounces almond paste (1 tube of Odense brand)
3/4 cup, plus 1/4 cup blanched almond flour
1 cup unsalted butter, at room temperature, cubed
1 1/2 tsp baking powder
3/4 tsp salt
1 tsp vanilla extract
1 tsp Amaretto (or almond flavored liqueur or almond extract)
6 large eggs, at room temperature

1) Preheat the oven to 325 degrees. Spray a 10" springform pan with cooking spray. Line the bottom of the pan with a round of parchment paper.

2) In the bowl of a food processor, grind the sugar, almond paste, and 1/4 cup flour until the almond paste is finely ground and the mixture resembles sand.

3) In a small bowl, whisk together the remaining 3/4 cup flour, baking powder, and salt.

4) Once the almond paste is completely ground, add the cubes of butter and the vanilla and Amaretto. Process until the batter is very smooth and fluffy.

5) Add the eggs one at a time, processing a bit before the next addition. You many want to scrape down the sides of the bowl while doing this.

6) Add half the flour mixture and pulse the machine a few times, then add the rest, pulsing the machine until the dry ingredients are just incorporated, but DO NOT OVERMIX.

7) Scrape the batter into the prepared cake pan and bake the cake for about 1 hour, or until the top is deep brown and feels set when you press in the center.

8) Remove the cake from the oven and loosen the sides with a small spatula or sharp knife if needed. Let the cake cool completely in the pan.

9) Once cool, tap the cake out of the pan, remove the parchment paper and invert the cake onto a serving plate (bottom is now facing up). Serve with berries and lightly whipped cream and dusted with powdered sugar. The cake stores well, tightly wrapped, at room temperature for up to 4 days.

29 June 2010

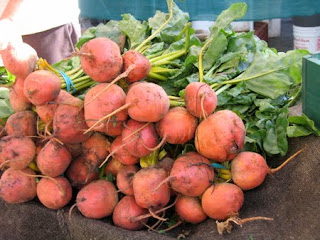
Roasted Golden Beet & Potato Salad with Walnuts


This is one of those salads that I make again and again. Everyone loves it, even those who are convinced they don't like beets (imagine?!). It spans seasons and is perfectly at home on a chilly winter evening when you want something cozy and comforting. However, it's equally perfect for a summer picnic. I generally serve it warm but it's just as good chilled. I often serve it as a main course salad atop a bed of arugula with a crumble of feta cheese. It can step in as a healthy take on traditional summer potato salad as well and is much better for a bbq as it doesn't have any of that oily, gloppy mayonnaise...yuck!

Golden beets are a good way to introduce non-beet lovers to the delicious world of beets. These are not those mushy, watery boiled beets or (gasp!) canned beets of old. These are sweet, caramelized, mild flavored beets that are deliciously roasted. Roasting is the only way to go with this root vegetable, in my opinion. It just brings out all their natural sugars and yumminess.

I hope you'll give this dish a try for your next picnic or bbq and report back about how it was received.

Enjoy!

For the salad:
Yields about 5 cups

1# fingerling potatoes (Russian banana or similar)
6 medium golden beets
1/3 cup toasted walnut halves
1TB fresh chives, chopped
2 TB extra virgin olive oil
2 tsp Herbes de Provence
2 TB champagne vinegar
sea salt & freshly ground black pepper

1) Heat the oven to 400 degrees. Line two baking sheets with foil.

2) Wash the potatoes and slice them in half lengthwise, and then into quarters. Spread them in a single even layer on one of the sheet pans. Drizzle with 1 TB olive oil and sprinkle with 1 tsp herbes de provence, sea salt & pepper. Set aside.

3) Peel the beets & trim off the roots and stems. Slice each beet in half and each half into thirds. Spread the wedges on the other sheet pan in one even layer. Drizzle with 1 TB olive oil and sprinkle with 1 tsp herbes de provence, sea salt & pepper. Place into the preheated oven, along the potatoes. Roast both trays for about 40 minutes until the veggies are caramelized and tender. Set aside to cool slightly.

4) While the veggies are roasting, toast the walnuts in a dry pan until fragrant. Set aside.

5) When the veggies are cooled slightly (about 10 minutes), toss them together with the chives and walnuts in a serving bowl. Drizzle with champagne vinegar and season with salt & pepper to taste. Serve warm, chilled, or at room temperature.

25 June 2010

Zucchini Crudi & Pecorino


Crudi means 'raw' and this is just that, a raw zucchini salad. It's so super simple, it barely warrants its own recipe. It's really more of a technique that you can adapt endlessly to whatever vegetable you enjoy that's in season. In the summer when zucchini is overflowing from my garden, going from sweet and petite one day to the size of a baseball bat the next, this is a great way to use it up at every stage.

This is a perfect side dish for anything grilled or for pizza, burgers.... It's just fresh and light and very simple, exactly the kind of food that's delicious on a hot summer day.

Enjoy!

Zucchini Crudi with Pecorino:
Yields about 2 cups

3 medium zucchini (@3/4#)
1 oz shaved Pecorino Romano cheese (the aged version works best here with the sharpest flavor)
juice of 1/2 lemon
1 TB extra virgin olive oil
1/2 tsp chopped fresh oregano
sea salt & freshly ground pepper

1) Using a vegetable peeler, shave the zucchini into your serving bowl. Shave off all of the skin and the flesh. When you approach the core of the zucchini (where the seeds are), stop shaving and discard that part. It can be tough and doesn't have much flavor, especially if the squash is on the large side.

2) Drizzle the lemon juice and olive oil over the top. Sprinkle with the fresh oregano, salt & pepper. Toss gently. Again, using your vegetable peeler, shave the Pecorino over top. Be sure to taste before adding too much salt as Pecorino can be quite salty. Adjust seasonings as needed. Allow to sit about 5 minutes at room temperature. The lemon juice will soften the zucchini ever so slightly. Serve chilled or at room temperature.


22 June 2010

Grilled Tomato Spaghetti


Happy Summer! It is officially here... the long summer days and the leisurely evenings of grilling and eating outdoors. This is my very favorite time of year. I love being outside and I love the warm (but not too hot) weather. I also love ALL of the summer produce.... summer squashes, stone fruit, berries, peppers, eggplant, and of course.... tomatoes!

We eat tomatoes in some fashion almost every night during the summer months. For slicing and eating raw I always opt for the juicy heirloom varieties, and of course those from my own garden are my favorites. However, there are a zillion ways to use the less prized varieties, which are also typically less expensive. Even just a simple preparation can elevate their flavor and texture tremendously.

This simple recipe is one of my favorites. It's quick and fresh and you can use almost any tomato you have on hand. I've made it with cherry tomatoes, Roma tomatoes, some of the more obscure Italian sauce tomatoes that are more mealy and less juicy. Whatever you choose, look for ones that have more 'meat' and less liquid. Tonight I used smallish 'Early Girl'. They were delicious!

Enjoy!

Grilled Tomato Spaghetti:
Yields 4 generous servings

1# Spaghetti ( I use Jovial g-free)
3 # tomatoes (I used Early Girls)
zest of 1 lemon
2 TB extra virgin olive oil
1 sprig fresh oregano
sea salt & freshly ground black pepper
2 TB prepared pesto (or homemade if you have it)
1 oz shaved Ricotta Salata cheese

1) Heat a large stock pot filled with water to a boil. While the water is heating, turn on the grill. Heat to 450 degrees. While the grill is heating, slice the tomatoes in half and place in a large bowl. Drizzle with olive oil and sprinkle with the fresh oregano leaves and salt & pepper. Set aside.

2) When the water is rapidly boiling, add a handful of salt. Return to a boil and add the pasta. Cook approx 8 minutes, until just Al Dente. Drain and set aside in serving bowl. Toss with a bit of olive oil and salt & pepper, just to coat the noodles.

3) While the pasta is cooking, grill the tomatoes. Cook, skin side down until the skin is just starting to blister and the flesh looks bubbly and begins to soften. Remove from the grill and toss with the pasta. Pour any remaining liquid left in the bottom of the bowl over the noodles as well. Add the lemon zest, toss gently.

4) Using a vegetable peeler, thinly shave slices of the Ricotta Salata over top. Drizzle with a bit more olive oil and top with a dollop of the prepared pesto. Serve warm.


15 June 2010

Soy- Glazed Grilled Salmon with Asian Slaw


I love the savory flavors of this delicious meal. It's healthy and fresh yet very satisfying. The salad is raw and the fish is cooked outdoors so it's great for a warm summer day where the last thing you want is to be standing over a hot stove or turning on the oven for any reason. Pair it with a crisp glass of Rose or Gewurztraminer.

This may well become a staple of your summer menu. It's easy enough for a weeknight dinner and 'fancy' enough for guests too. I hope you'll give this one a try tonight.

Enjoy!

For the Soy-Glazed Grilled Salmon:
Yields 4 servings

4 salmon fillets (about 6 oz each)
2 TB low sodium tamari (soy sauce)
4 tsp honey
juice of 1 orange (about 3 TB)
1 tsp rice vinegar
1/2 tsp fresh grated ginger
1/2 tsp red chile flakes
sea salt & freshly ground black pepper

1) Season salmon fillets with salt & pepper, set aside. In a small bowl, whisk together the remaining ingredients. Pour half of the glaze over the salmon & allow to marinate at room temperature 10-15 minutes.

2) Heat the grill to 450 degrees. Place the salmon, skin side down on the hot grill. Baste with the remaining glaze several times while the fish is cooking to create a shiny glaze. Grill until just cooked through, without flipping, about 10 minutes.

For the Asian Slaw:
Yields about 6 cups

1 small head red cabbage, shredded
1/2 small head napa cabbage, shredded
3 large carrots, grated
2 scallions, white and light green parts only, thinly sliced
1/2 cup whole almonds, toasted & roughly chopped
1/2 cup dried apricots, roughly chopped
1/4 cup rice vinegar
1 TB toasted sesame oil
2 TB extra virgin olive oil
2 TB honey
1 tsp white or brown sesame seeds
sea salt & freshly ground black pepper

1) In a large bowl, whisk together vinegar, honey, oils, sesame seeds, salt & pepper. Add cabbages, carrots, and scallions. Toss cabbage in dressing. Set aside in refrigerator at least 30 minutes, or up to 2 hours.

2) When ready to serve toss cabbage again to re-incorporate dressing throughout. Season with salt & pepper. Sprinkle the apricots, almonds, and a few more sesame seeds over the top. Serve chilled.

For garnish:
1/2 ripe Haas avocado
1 ripe Nectarine

1) I garnish this with a few slices each of avocado and nectarine. Why you ask? Well, because nectarines are delicious right now and they bring out the flavor in the Rose. Avocados, because I LOVE them and I think they make everything better (sort of like butter).


12 June 2010

Lavender Buttermilk Pancakes w/ Raspberry-Mascarpone Topping


It's always fun to start a weekend morning with something a little special for breakfast. My usual weekday breakfast consists of my homemade granola, homemade yogurt, and fresh fruit. I do consider that to be pretty special but it's fun to mix it up every so often when time allows.

Since I visited a lavender and bee farm this past week (photo above is from the farm) and came home with some fresh lavender blossoms and fragrant lavender honey, I thought it would be a good way to incorporate all the special treats I picked up. I was also fortunate enough to be given some amazing eggs from my friend's adorable backyard chickens which found their way into a frittata earlier this week and I had exactly enough left for these pancakes. Lucky me!

I had no fresh fruit to speak in the house of and I'm not a huge fan of syrup on my pancakes so I made a topping of raspberry jam and mascarpone with a little of the lavender honey. It was lovely and I think this might become my new 'go to' pancake topping. Of course, pancakes are a great excuse for copious quantities of good melted butter on top and you know how I like butter. I just feel all that maple syrup gets in the way of my butter tasting abilities which is just not okay by me.

I hope you'll make these this weekend! Easy, yummy, fast, special.... what's not to love?!

Enjoy!

Lavender Buttermilk Pancakes:
Yields approx 16, 4" diameter pancakes

1 1/2 cups brown rice flour
1/2 cup quinoa flour
1/2 cup brown sugar
1 TB baking powder
1/2 tsp salt
1 tsp chopped lavender blossoms
1 cup low-fat buttermilk
1 cup milk
1 tsp vanilla extract
2 eggs
4 TB melted butter, plus more for griddle

1) In a large bowl, whisk together the dry ingredients (flours through lavender blossoms). Add the wet ingredients (buttermilk through melted butter) and whisk to combine all. If you have the time, let sit at room temperature for a few minutes while you mix the topping.

2) Heat a griddle to medium high. Brush with a bit more melted butter. Spoon the pancake batter onto the hot griddle and cook until little bubbles appear all over the surface of the pancake and the edges appear set. Flip over and repeat on the opposite side.

3) Transfer to serving plates, drizzle over a bit more melted butter, top with the rapsberry-mascarpone mixture and enjoy!

For the Raspberry- Mascarpone Topping:
Yields about 1/3 cup

4 oz mascarpone cheese, softened
2 TB raspberry jam ( I like Bonne Maman)
2 tsp lavender honey (or any other flavor you have on hand)
1 tsp fresh lemon zest

1) Heat the mascarpone & the jam together in the microwave until both are just soft enough to stir together, about 10 seconds. Whisk them together, removing any lumps in the cheese. Drizzle in the honey and lemon zest and stir to combine.


08 June 2010

Green Chile & Squash Blossom Quesadillas


Roasted green chiles and squash blossoms with jack cheese make for a really delicious quesadilla! I roast the chiles on the grill and then grill the quesadillas to melt all the cheese and crisp up the tortillas. In the summer I serve these with a stone fruit salsa, usually composed of plums and nectarines with lime, jalapeno, & cilantro. Yumm.

Anything inside of a tortilla with melty cheese is my idea of a good dinner. They couldn't be easier, of course. Even with the fancy salsa they take 15 minutes total to bring together. Serve with a simple side salad and dinner is done!

For the quesadillas:
Yields 4 servings

8 corn tortillas
3 oz shredded monterey jack cheese
4 medium Poblano chiles
12 squash blossoms, stamens and stems removed

1) Brush the chiles lightly with olive oil. Place them on a hot grill until the skins are completely black and charred all around, about 3-4 minutes per side. Place them in a bowl and cover with plastic wrap to steam for 5 minutes. The skins should peel right off. Remove the seeds and ribs and dice finely.

2) Coarsely chop the squash blossoms and place them in a bowl with the chiles. The residual heat from the chiles should wilt the squash blossoms enough for your purposes here.

3) Sprinkle the cheese on the tortillas and spread around a couple of tablespoons of the chile/blossom filling. Top with another tortilla, brush each half lightly with olive oil and grill until crispy and the cheese is melted.

For the stone fruit salsa:
Yields 1 1/2 cups

2 medium red flesh plums (like Santa Rosa), diced into 1/2" pieces
2 medium yellow flesh nectarines, diced into 1/2" pieces
1 medium jalapeno chile, ribs and seeds removed, finely diced
6 sprigs cilantro, leaves removed and finely diced
juice of 1 lime
sea salt & black pepper to taste

1) Combine all ingredients in a bowl. Stir to combine. Refrigerate until ready to use. Serve on top of quesadillas or with anything else you can imagine.... chips, crudite, grilled fish etc....

(thank you, Harvard Farmers Market for the use of your photo)

07 June 2010

Grilled Portobello Mushrooms Caprese


Tonight's dinner is one my easiest summer meals. It comes together quickly on the grill with very little prep ahead of time. It's both hearty and fresh at the same time. It's a perfect vegetarian alternative if you're having folks like me over for a BBQ. All of the ingredients are in season throughout the summer months so it's perfect to make now.

The portobello mushroom is essentially just an overgrown crimini (italian brown mushroom). They're nothing particularly fancy or special but they are very flavorful and 'meaty'. For that reason they take well to grilling as they become juicy and tender and hold up well on a hot grill.

A Caprese salad is just a tomato, basil, and fresh mozzarella salad. Those three ingredients are truly a match made in heaven, each simple ingredient elevating the other. Use the freshest ingredients you can find here as there's very little 'cooking' involved so each element really needs to stand on its own. I typically just use fresh cow's milk mozzarella here but feel free to use buffalo mozzarella if you prefer.

A perfect side dish for this dinner would be grilled polenta squares or grilled corn. Tonight we had simple grilled corn, the first of the season here, and a green salad. It was light and satisfying and very summery! Perfect for an evening of sipping white wine while dining al fresco.

Enjoy!

Grilled Portobellos with Caprese Salad:
Yields 4 servings

For the mushrooms:
4 medium portobello mushrooms
1 TB olive oil
2 tsp balsamic vinegar
sea salt & freshly ground black pepper

1) Prep the mushrooms by removing their inner 'gills'. Scrape them out gently with a teaspoon. This keeps them from turning everything else in the salad an off-grey color and in my opinion lightens the overall flavor. I also remove the outer skin. You should be able to just peel this back carefully with your fingers.

2) Once the mushrooms are prepped, with the gill side facing up, drizzle them with the olive oil & balsamic and season with salt & pepper. Cover with plastic wrap and set aside at room temperature to marinate while your grill heats up.

3) When the grill is ready, place the mushrooms 'gill side up' on the hot grill. Grill until juicy and tender, turning once halfway through. This should take about 5-7 minutes at 450 degrees.
While they are cooking, prep the Caprese salad.

For the Caprese Salad:
3/4 pint cherry or grape tomatoes, halved
4 sprigs fresh basil, leaves removed and thinly sliced
2 balls fresh mozzarella cheese, cut into 1" dice
sea salt & freshly ground black pepper
1 TB extra virgin olive oil
1 tsp red wine vinegar

1) In a medium bowl, combine the halved cherry tomatoes, the diced mozzarella, and the sliced basil leaves. Drizzle with the olive oil & vinegar and sprinkle with salt & pepper to taste. Refrigerate until ready to use.

2) When the mushrooms are ready, top each one with about 1/3 cup of the Caprese mixture. Serve while mushrooms are warm.


05 June 2010

Finished!

The kitchen is finished...well almost. There are still a few last details to attend to but it's finished enough for a proper cleaning and to move everything back in. I'm delighted with how it all came together although am still getting used to the 'newness' of it all, trying to figure out where to put everything etc....

Tonight was our first dinner made in the new space and all I've been dreaming about eating amidst all the take-out, salad bar, burritos etc... has been a perfectly poached farm egg with some simply sauteed potatoes and vegetables. Nothing fancy, just simple, homemade, fresh food that you just can't get anyplace other than home. So, that's exactly what I made and it was delicious.

I'm so looking forward to getting back to my cooking routines and to sharing lots of recipes in the coming days, weeks, months.

Bon Appetit!


02 June 2010

The Final Days


Dare I say, I think we're almost there. Just a few more days and the new and improved kitchen will finally be ready. I can't wait to get back to cooking! My stack of recipes to try and ideas for inspiration is growing by the day so I'll have lots to share starting next week.